Fireplace upgrade
- Stephanie

- Sep 16, 2020
- 3 min read
Our fireplace is 25 years old. It's a wood burning one so I can't wait to use it during the winter. I just feel like it a huge focal point in our living room and where it's functional and working it's just not pretty to look at.

So I looked in to my options and what all you can do to a fire place. I was so ready to jump in to this project and I'm glad I did. Once I found something I like off to the store to buy the supplies, but first we tape.

I have everything taped off here. I wanted to start with getting rid of the gold. I found a high heat black paint for this. I bought the spray paint style only because I didn't know it came in a can. So I used a box to keep the spray from going everywhere.

So here is the high heat spray. I was going to paint the wood part of the fireplace with chalk paint color white. This was all they had at my local store so instead of driving 40 mins to the next store I just got the spray in the same brand I was going to use.......Is no one going to stop me and tell me this is all a stupid idea?! Cause it was OMG it smelt so bad in the house like all day from all the spray paint. I knew I did but ugg. So I used the box again to make sure the paint didn't get everywhere. Now the best part about this is you don't have to prime or sand down your project if you use chalk paint. That is what I found out from all the articles and videos I found. You do have the option to seal it with wax that is what is in the tin can. Super easy to do.

After using both cans I got and two layers of it on the wood I wasn't happy with the coverage. Now at this point I'm kicking my self saying I should have just drove the 40 mins to the hardware store, because that's what I ended up doing. Once I had a pint of white chalk paint and a nice brush I was good to go and let me tell you so much happier with the coverage.
Now I found this home flooring kit at home depot. It comes with step one the color and step two a sealant and a small bottle of heavy duty cleaner. It's a $40 kit and you can buy more of step one if you need it. I found I used more of step one than two. This stuff is thick! I have no idea what was happening but at first I put it on and in spots it wouldn't stay but bubbled up and pealed back. I think I wasn't applying it thick enough because after that I didn't have that problem again.


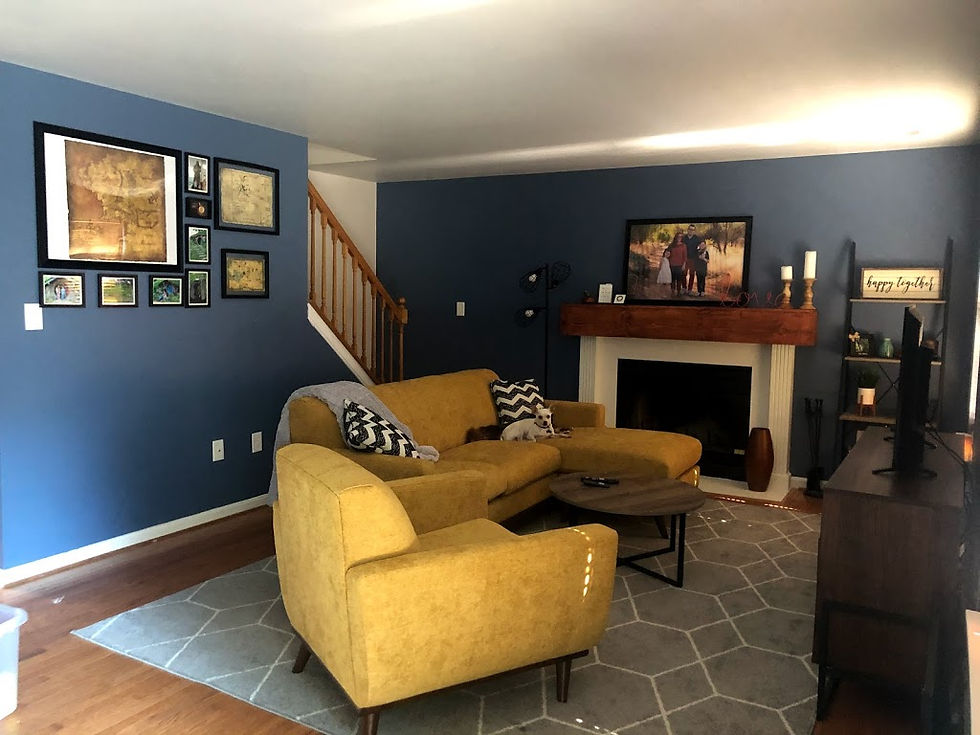
So this is where we are at. Chalk white paint and now its is also waxed sealed. The granite is now covered with white floor coating and the sealant. I don't know if you can see if but on the left side where the wood and the granite meet there is a black line/space. I went over the whole thing with white caulking to give it a very finished look. Now is the fun part building the mantle cover. For this all I did was measure the existing mantle and add two inches to each side. The wood I had on hand was a perfect fit. I sanded the wood down cut it to size, glued it, and nailed it together to make a cover. I sanded it again to make sure all the seams were good. Then after a long day I stained it a walnut color to dry over night. Come the next day and its done!

Im not going to lie I did a happy dance! I could not be more in love with this! It turned out just like it did in my head and I'm so happy and a bit proud of myself and the work I put in to this. Took me about a week to finish it, having to let paint dry and stuff. I was a bit upset if you look on the wall to the lower right umm my painters tape took off my wall!!! I guess it's going to be ok because I'm getting ready to paint the walls a pretty shade of blue.
Now to decorate this thing....any ideas? I would love to hear them.


Are you going to do any special Halloween decorations? Please post pictures of you do!